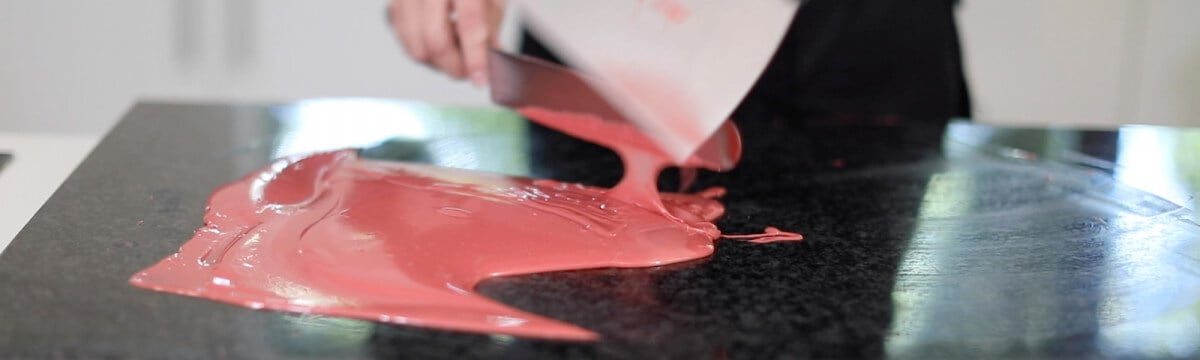
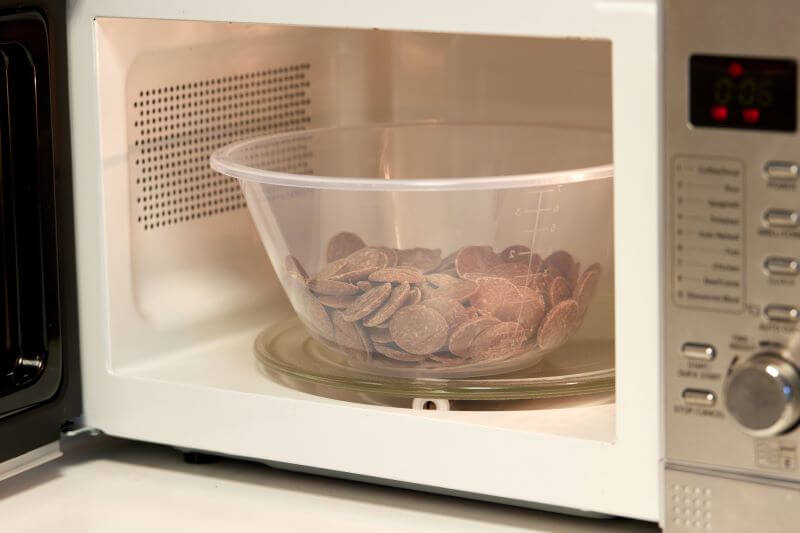
Due to a sudden increase in order volume we're currently fulfilling deliveries within a 48-hour window. We sincerely apologise for any inconvenience this may cause.
Due to an increase in orders all deliveries are currently 48h. We're sorry for any inconvenience.
Audio is generated by DropInBlog's AI and may have slight pronunciation nuances. Learn more
Mastering the art of tempering chocolate is like unlocking the secret to a glossy, satisfying treat that's free from any unwanted white powdery coating. It's all about playing with temperatures just right to coax those lovely cocoa butter crystals into formation.
In this post, we delve into the surprisingly accessible technique of tempering chocolate in the microwave.
Equipment:
Microwave Plastic bowl Spatula Thermometer Bar mould Scraper Piping bag Scissors Heat gun
Partial melting: Place chocolate in a microwave-safe bowl, heating in 20-second bursts, stirring in between, until it's ¾ melted.
Final melting: Once most of the chocolate is melted, remove it from the microwave and continue stirring vigorously. Use residual heat, for instance a heat gun to melt remaining solid pieces, ensuring a smooth consistency.
Temperature check: Test the chocolate's temperature with a thermometer; it should reach around 88-90°F (31-32°C) for dark chocolate and 86-88°F (30-31°C) for milk or white chocolate.
Seeding method: Add small pieces of un-melted chocolate (seeds) to the melted chocolate while stirring continuously. This helps to stabilize the temperature and encourage the formation of desirable cocoa butter crystals.
Patience is key: Allow the seeded chocolate to rest for a few minutes, continuing to stir occasionally. This helps the crystals to develop properly, resulting in a glossy finish and satisfying snap.
Final adjustment: If necessary, gently warm the chocolate again in short bursts to reach the desired working temperature, ensuring not to overheat and lose temper.
Other methods of tempering chocolate
We explore other traditional methods for achieving the perfect temper, providing you with options suited to your preferences and kitchen setup.
Marble (or table) tempering
Melt chocolate: Heat 2/3 of your chocolate to 45°C.
Cool on marble: Pour the melted chocolate onto a marble slab. Using a palette knife and scraper, spread and gather the chocolate continuously, promoting cooling and crystallization.
Mix and temper: Once thickened, move the chocolate back to a bowl. Integrate the reserved 1/3 of warm chocolate to reach the target working temperature, ensuring a uniform consistency.
Testing: Always check the chocolate's temperature matches the type you're working with before use.
Test: Ensure the chocolate is properly tempered before use.
Testing for proper tempering
Before filling moulds or using the chocolate, it's crucial to test its temper. A simple method is to apply a small amount to a piece of parchment paper; it should harden within a few minutes and have a glossy finish without streaks.
Final application
Once tempered, chocolate can be transferred to a piping bag and used to fill moulds, ensuring professional-quality results.
Conclusion
By mastering these tempering techniques, chocolatiers, chefs and bakers can ensure their chocolate creations have the desired appearance, texture, and quality. Practice with each method to find the one that best suits your preferences and the demands of your culinary projects. With practice, you'll be creating chocolate treats that look as good as they taste.
Join Development Chef Samantha Rain and Fabien Levet from Pidy to understand how the Pidy Selection...
more
Hey! Looks like you've changed your theme and now DropInBlog's code needs to be re-added to your theme files.
Follow these instructions to solve this right away. Or hit us up on Messenger if you'd like some help.