For an ‘eye-watering’ treat, this melting chocolate eyeball dessert will send shivers down the spines of your diners. The outer casing melts to reveal a spooky Halloween skull.
Melting chocolate eyeball
Skull
Ingredients600g White Base (recipe below) Skull mould available online |
MethodBlend the green mint paste into the white mix and allow the white base to soften, almost to the point of returning to a liquid. Pour into the mould and swill around to fill all cavities and then top up and place in blast freezer for 40 mins to harden fully. When the skull is solid remove from the mould and place on a tray. Return into the freezer for 10 mins to harden again. |
Eyeball
Ingredients800g Belcolade white chocolate 0.5g Sosa white food colouring (dose rate 300mg per kilogram) 1g Sosa Home Gourmet black food colouring (dose rate 300mg per kilogram)
|
MethodWe have used a large sphere mould for this recipe as it had to be big enough to have the skull inside. Start by painting the inside of the sphere with a white blotch followed by the round black pupil. Finally a little blue for the iris. |
Decoration
Ingredients (as above)white = 500g of cocoa butter with 0.5g colouring red = 250g of cocoa butter with 0.25g colouring blue = 125g of cocoa butter with 0.12g colouring |
MethodThe white blotch will look like light reflection in the eye and give life to the finished product. When you are happy that you have all the detail allow to fully dry. The other half of the sphere can be painted in the same way without the pupil. Pour a little of the white into the mould and swill it around until the whole mould is coated and pour out the excess. (Details of how to melt chocolate can be found on the website). Assemble the sphere and rotate to coat the whole mould with chocolate and keep moving until you are happy the whole of the mould has been coated then leave to harden. Once the chocolate has set carefully remove from the mould.
|
Caramel
Ingredients250g Sucranna granulated sugar |
MethodHeat water and sugar in a pan over a medium heat don’t stir as it may cause crystallisation in the finished sauce, just pick the pan up and gently shake to move the mixture a little. (BE CAREFUL THIS IS VERY HOT AND WILL BURN) Once fully dissolved remove from the heat and add the colour, cream and butter and whisk until smooth. You can adjust the colour to taste, we have gone for a deep red. |
Decoration
MethodHeat a baking tray in the oven and place on a heat proof surface or you can heat a cookie cutter just make sure that it is big enough to allow the skull to pass through it. Keeping the pupil at the centre of the sphere melt the bottom until you have hole large enough to put over the skull. Remove the skull from the freezer and put on a chilled plate and allow to warm slightly before putting the chocolate sphere over the top then when ready to serve heat the caramel and pour over the top of the eye the heat will melt the chocolate and cause the sphere to break revealing the green skull within. |
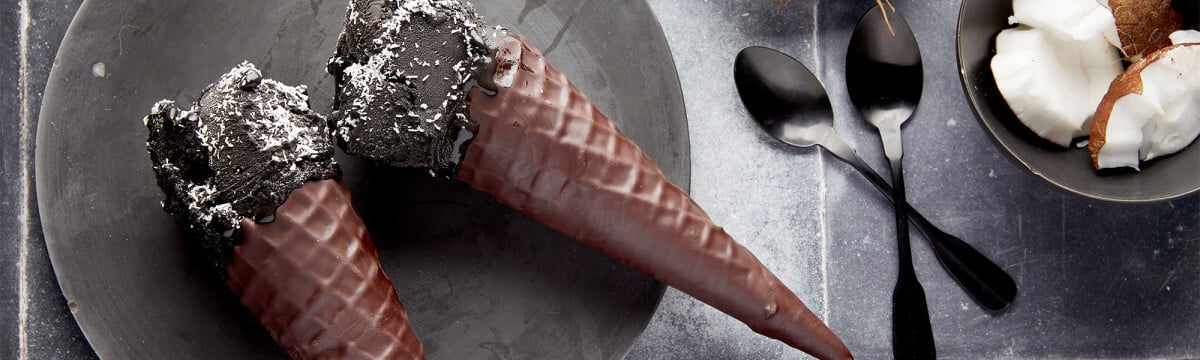
Takeaway coffins
Ingredients400g Belcolade Ugandan dark chocolate 80% buttons 1000g white base (recipe below) 40g Irca joypaste wild berries flavour paste Coffin shaped mould available online |
MethodBlend the wild berry paste (or your chosen flavour) into the white base and pour into your batch freezer and select your usual gelato program. Temper your chocolate (see our website for our tempering instructional videos), fill the mould with chocolate, allow to stand for a minute then turn over and remove excess chocolate and set aside to harden. If using a silicon mould, don’t be tempted to remove the shape as it may break. Instead leave in the mould and pipe the mint gelato into the coffin and then put into the blast freezer. Once hardened carefully remove from the mould |
Tombstones
Ingredients1000g white base (recipe below) 15g Sosa Home Gourmet black food colouring Tombstone moulds available online |
MethodBlend a small amount of black food colouring into the base mix to create a grey, stone-like colour, then push into the tombstone moulds making sure to push into the corners. Put in the blast freezer to set. When solid, remove and de-mould. Highlight details on the tombstone if desired using black food colouring. |
Zombie hand
Ingredients5000g white base mix (recipe below) |
MethodBlend the mint paste into the white base mix until a uniform colour with no streaks. Pour into the batch freezer and select your usual gelato setting. When the gelato is ready, fill the pan and use the spatula to make a smooth flat top as you would for a cremini. Place the leftover mix in a bowl and allow to soften. Cover the top with the black cookie granules and place in the blast freezer to harden. Take a food prep glove and, using the handle of a wooden spoon, push or pour the softened mix into the glove, making sure to get mix into the ends of the fingers. Once filled, use a long bag clip to seal the glove. Tip: To shape the hand in the blast freezer, place the glove on a grapefruit and the hand will develop a more natural, ‘grabbing’ shape. Once set remove the pan and the hand and peel the rubber glove off the hand. Scrape some of the topping away and run a spoon under the tap to warm and make a small hollow to sit the hand in, then carefully return it to the blast freezer to harden. Once set, scatter any green chocolate soil you may have left over from the coffin recipe. Place the finished pan into the display cabinet |
Decoration
MethodIf making as a dessert, place 30g Hillbo green coloured white chocolate rizo curls mixed with 30g Hillbo black coloured rizo curls (to create chocolate soil) on the plate and place the gelato filled coffin on top. Add a small amount of black cookie granules onto the coffin and place the headstone at the end to simulate an open grave. |
White base
Ingredients1030g milk (1 litre) (3.5% Fat)160g double cream (48% Fat) 55g skimmed milk powder 210g Sucranna granulated sugar 22g dextrose 50g spray dried glucose 4g Rubicone neutro 5AU |
MethodTo calculate the amount of mix you require, multiply all elements/ingredients by 42 to make 60 litres of finished mix, or multiply all elements/ingredients by 21 to make 30 litres of finished mix. Start by mixing all the dry ingredients together, this prevents the skimmed milk powder from forming lumps as you add it to the milk. Start with the milk in the pasteuriser, select your desired pasteurisation program, we have used the low pasteurisation at 65˚C. Once your milk reaches 40˚C, gradually add all the dry ingredients. Once the mixture reaches 50˚C, add the cream. Let the pasteuriser run its program, taking the mixture up to 65˚C, then holding it at 65˚C for 30 minutes, then rapidly cooling the mixture to 4˚C. Once the mixture has reached 4˚C, allow the mixture to age for between 4 and 12 hours (12 hours being preferred for best results). |
Recipe ideas
If your machine won’t take 1 litre as a minimum mix, multiply the mixture accordingly to meet your minimum mix needed.